Rust WebAssembly OCR experiments
Published on March 10, 2022
Table of contents
Introduction
After rewriting Cyberscore, I wanted to actually submit some scores to the website. The latest game I’ve been playing is Pokémon Legends: Arceus, which has around 3000 score charts on Cyberscore. I didn’t feel like submitting that many records manually, so I started working on a tool to automate it instead.
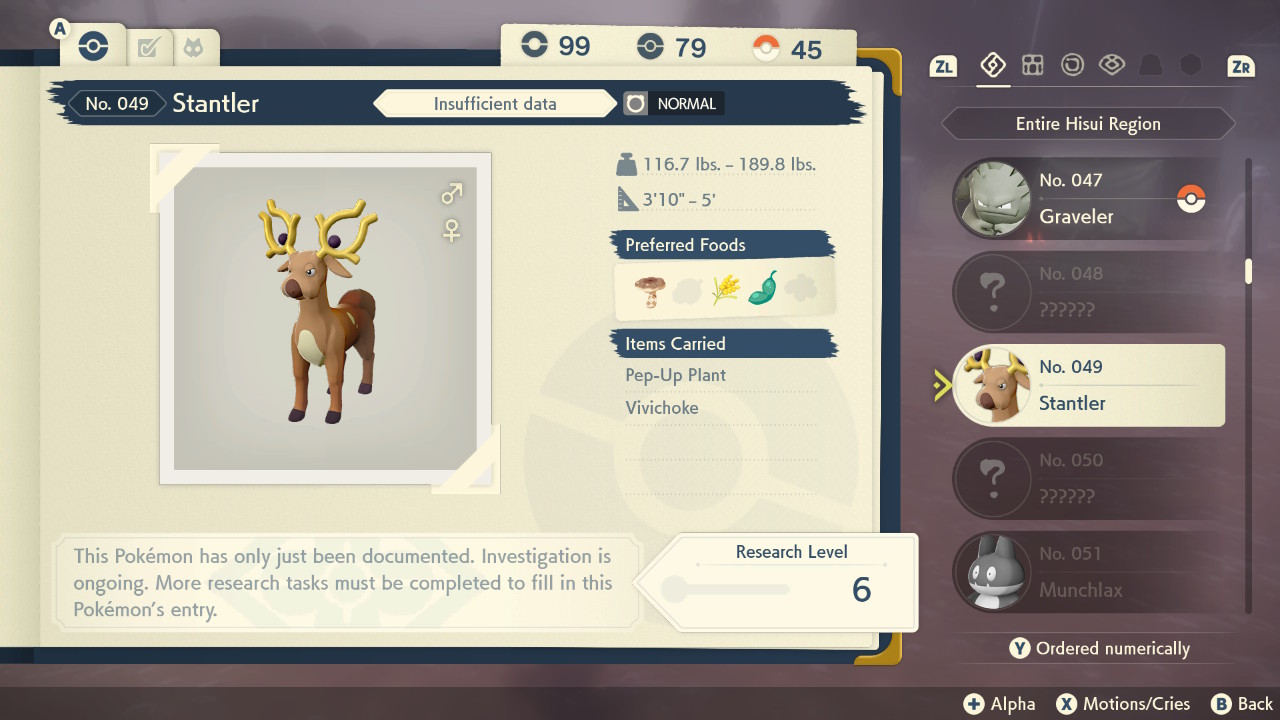
Most of these scores come from the pokédex. Each pokémon species has a pokédex entry with two pages. The first page shows some generic information like name, type, preferred foods, and also showing the minimum and maximum weights and heights of every specimen you caught:
The second page shows the research tasks associated with that species and the research level you’ve reached:
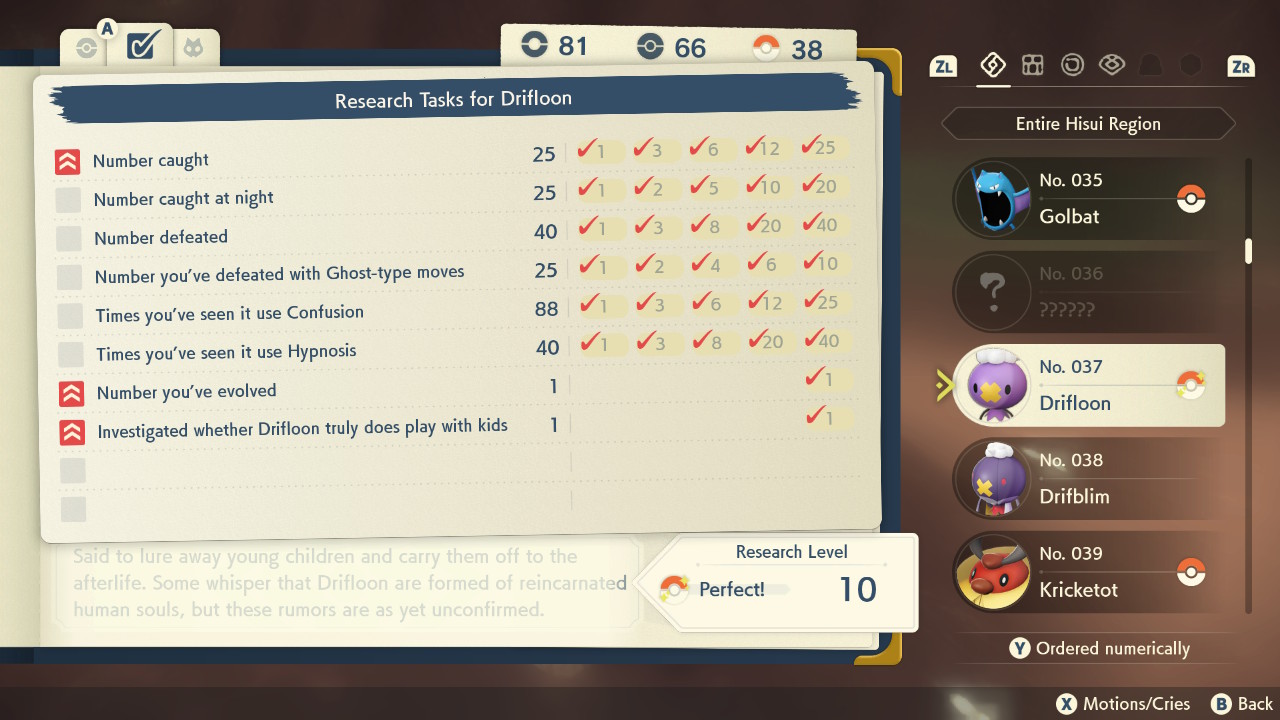
In these two screenshots alone, there are at least 12 scores that can be submitted to Cyberscore: weight and height ranges (4), research level (1), and research tasks (7, the last one is a game quest and doesn’t count). Cyberscore also allows you to upload screenshots or videos as proof of your high scores, so detecting the scores from the screenshots and automatically submitting both sounded like a good idea.
There’s already a user-contributed tool for New Pokémon Snap that, using Python and OpenCV, takes a bunch of screenshots and generates a CSV with the scores. Lots of folks use it, but I wanted something integrated directly on the website to avoid the step of having to install something locally; just upload all the screenshots, confirm that the detection had no errors, and you’re done.
This post will go over two things: the process of extracting the scores from the JPG in rust, and the process of embedding it in Cyberscore’s frontend.
Link to the source code and a demo video at the end of the post.
Detecting scores from screenshots
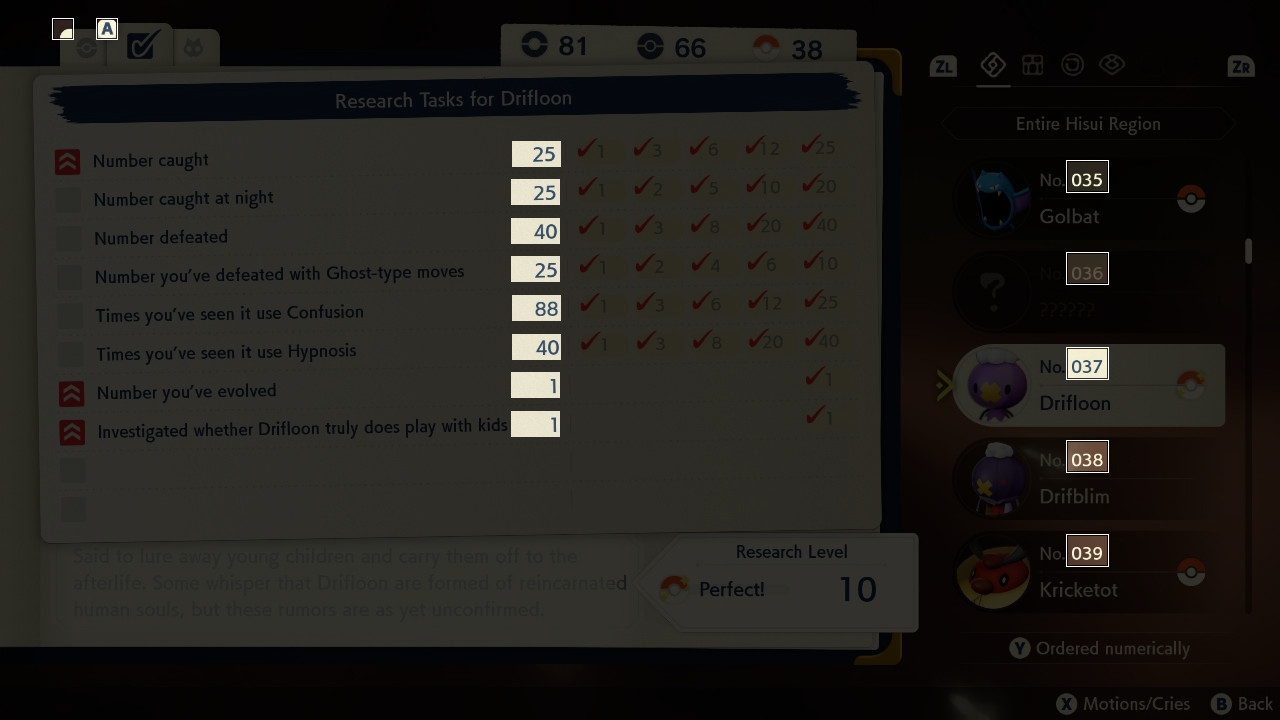
Detecting scores was not that hard: since we’re handling game screenshots, the information is always in the same spots and with little pixel variance. The first step was to figure out what I had to detect. The first thing was to find out which of the five pokemon in the list was the selected one and read its pokédex number. Then, I had to know which pokédex page was being shown (there are three possible pages) and read the right numbers depending on the page. This gives us the following rectangles to work with:
To figure out which of the five pokémon species is selected, I calculated the average color of the top rows of each of those five rectangles on the selection list and found the one closest to white. I averaged each RGB channel independently and calculated their distance to 255. I could probably have calculated the average brightness and used that instead as well, there are many ways to do this particular operation in this case, I just picked whatever worked first.
The next step was to detect the actual pokédex number. I started with the usual thresholding operation, which looks like this:

To find the individual digits in the black and white version, I detected all groups of connected pixels using a Disjoint-set data structure. For each digit, this would give me a set of pixels (with their positions arbitrarily anchored of the top-left corner of its own bounding box). To detect which digit each set represents, I started by grabbing a bunch of samples for each digit from some screenshots and built a PNG with them:
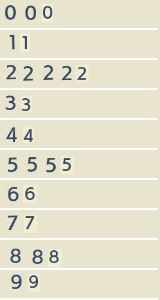
Applying the same thresholding and connected pixels detection to this template,
I could find the one that more closely matched the digit being detected using
Template Matching. In short, this algorithm goes through each pixel
inside the bounding box of both the template and the digit, finds how many
pixels match, and returns the best candidate. Ordering the digits by
x-coordinate would give me [0, 3, 7], which is easily converted to 37.
I applied the same technique to the other pokédex page. It needed some extra code because sometimes the weights and heights only contain a single number instead of a range, but using some regular expressions on the detected text solved the problem.
To tell which pokédex page is selected (general info or research tasks), I
detected where the A in the top left tabs is located using template matching
in both possible locations.
The end result of this process was a library with the following interface (omitting a few attributes for clarity):
1
2
3
4
5
6
7
8
9
10
11
12
13
14
15
16
17
18
19
20
21
22
23
24
25
26
27
28
29
30
31
32
33
34
pub struct PokemonLegendsArceusOCR {}

impl PokemonLegendsArceusOCR {
  pub fn new(a: image::DynamicImage, b: image::DynamicImage, c: image::DynamicImage);
  pub fn selected_page(&self, proof: image::DynamicImage) -> Option<PokedexPage>;
  pub fn research_tasks(&self, proof: &image::DynamicImage) -> Option<ResearchTaskProof>;
  pub fn info(&self, proof: &image::DynamicImage) -> Option<InfoProof>;
}

pub enum PokedexPage {
    Info,
    ResearchTasks,
}

pub struct ResearchTaskProof {
    pub dex: usize,
    pub tasks: Vec<u32>,
}

pub struct InfoProof {
    pub dex: usize,
    pub weight: Weight,
    pub height: Height,
}

pub struct Weight {
    pub min: u32,
    pub max: u32,
}

pub struct Height {
    pub min: u32,
    pub max: u32,
}
All those images in the constructor are the different classification templates used in each function.
Compiling it to WebAssembly
To get started, I followed MDN’s guide on “Compiling Rust to
WebAssembly” and installed wasm-pack, and adapting Cargo.toml:
1
2
3
4
5
6
7
8
9
10
[lib]
crate-type = ["lib", "cdylib"] # added cdylib

[dependencies]
image = "0.24.1"

# added these three libraries
wasm-bindgen = "0.2"
js-sys = "0.3.56"
console_error_panic_hook = "0.1.7"
To get my library working in WebAssembly, I started by simplifying the API to a
single function that takes a array of bytes that represent the proof jpg and
returns whatever it detects. To make things easier, the training images were
embedded in the program using the include_bytes! macro.
1
2
3
4
5
6
7
8
9
10
11
12
13
14
15
16
#[wasm_bindgen]
pub fn ocr_pla_dex(proof: &[u8]) -> Proof;

#[wasm_bindgen]
pub struct Proof {
    #[wasm_bindgen(getter_with_clone)]
    pub research: Option<ResearchTaskProof>,
    pub info: Option<InfoProof>,
}

#[wasm_bindgen]
pub struct ResearchTaskProof {
    pub dex: usize,
    #[wasm_bindgen(getter_with_clone)]
    pub tasks: Vec<u32>,
}
Structs with wasm_bindgen automatically generate getters and setters for
every public member, but for that to work those members must implement Copy.
Since Vec doesn’t implement that trait, I needed to use getter_with_clone
clones the object instead. Thanks to its Vec member, ResearchTaskProof is
also not Copyable, so I had to do the same to pub research.
With this, I was able to run wasm-pack build --target web and get a bunch of
files in pkg/, including pla_ocr.js and pla_ocr_bg.wasm.
1
2
3
4
5
6
7
8
9
10
11
12
13
14
15
16
17
18
<script type="module">
  import init, {ocr_pla_dex} from "/js/ocr-pla/pla_ocr.js";

  init();

  window.ocr = ocr_pla_dex;
</script>

<script type="text/javascript">
document
  .querySelector("#proof-form")
  .addEventListener('submit', async (ev) => {
    const file = document.getElementById('proof-form-field').files[0];
    const buff = await file.arrayBuffer();
    const bytes = new Uint8Array(buff);
    const result = window.ocr(bytes);
  });
</script>
The wasm file is loaded by pla_ocr.js using a relative URL, but it can be
passed to init if the location is different.
When I first ran the code in the browser, it didn’t work. I was getting a
“Unreachable code” exception in the console. With console_error_panic_hook
enabled, I was able to see the actual exception: the image crate was trying
to use threads to decode the screenshot jpeg. This feature seems to be enabled
by default, so I had to change Cargo.toml to disable the default features and
only pull in the features I thought were necessary:
1
2
3
4
5
6
[dependencies]
image = {
  version = "0.24.1",
  default-features = false,
  features = ["gif", "jpeg", "png", "webp", "farbfeld"]
}
Doing this solved the problem, and things started working. After some tinkering with Cyberscore’s code, I managed to fully integrate the proof OCR library into the website and everything is working fine. Here’s a video of the final result:
Conclusions
The hardest part of this was probably all the extra javascript to match the OCR results to cyberscore’s charts. There are some edge cases that I had to handle, like not submitting scores that are zero, or not submitting scores that are worse than what was previously submitted. The next step would be to find a way to generalize this to support multiple games.
Other players started using this tool and apart from making it way easier to submit scores, it reduced the number of mistakes they made during data entry.
The source code for the rust portion of this project is available at https://gitlab.com/cyberscore/auto-proofer. The Javascript part is not available, since Cyberscore is not free software yet, but the most relevant bits are described above.
If you’re interested in computer vision stuff, check out my Rustconf 2021 talk on Identifying Pokémon Cards. It covers a very different use case but it goes through some basics of image processing and common algorithms of the field.